Adding Widgets
Adding widgets to the template
All important widgets are located inside zento/partials/widgets, these widgets can work inside Sidebar or Footer and be imported as a “partial”. The most important is to follow the widget name format, example “recent-articles” note that .hbs part is removed when using partials.
The full list of widgets are:
- About Me (not visible in demo but available):
zento/partials/widgets/about.hbs - Advertising (not visible in demo but available):
zento/partials/widgets/advertising.hbs - Recent Articles:
zento/partials/widgets/recent-articles.hbs - Related Articles (not visible in demo but available):
zento/partials/widgets/related-articles.hbs - Social Profiles:
zento/partials/widgets/social-profiles.hbs - Tag Cloud:
zento/partials/widgets/tag-cloud.hbs - Text Widget (used in footer):
zento/partials/widgets/text-footer.hbs
How to add widgets to the sidebar
- Go to
zento/partials/sidebar.hbs - All widgets are inside the folder
zento/partials/widgets - Add the desired widget following the next format
{{> widgets/about }}after tag-cloud and inside “aside” HTML tag. - For larger name widgets use:
{{> widgets/featured-articles }}
So if you want a base to create your own widget, it is recommended to copy text-footer.hbs content into sidebar.hbs
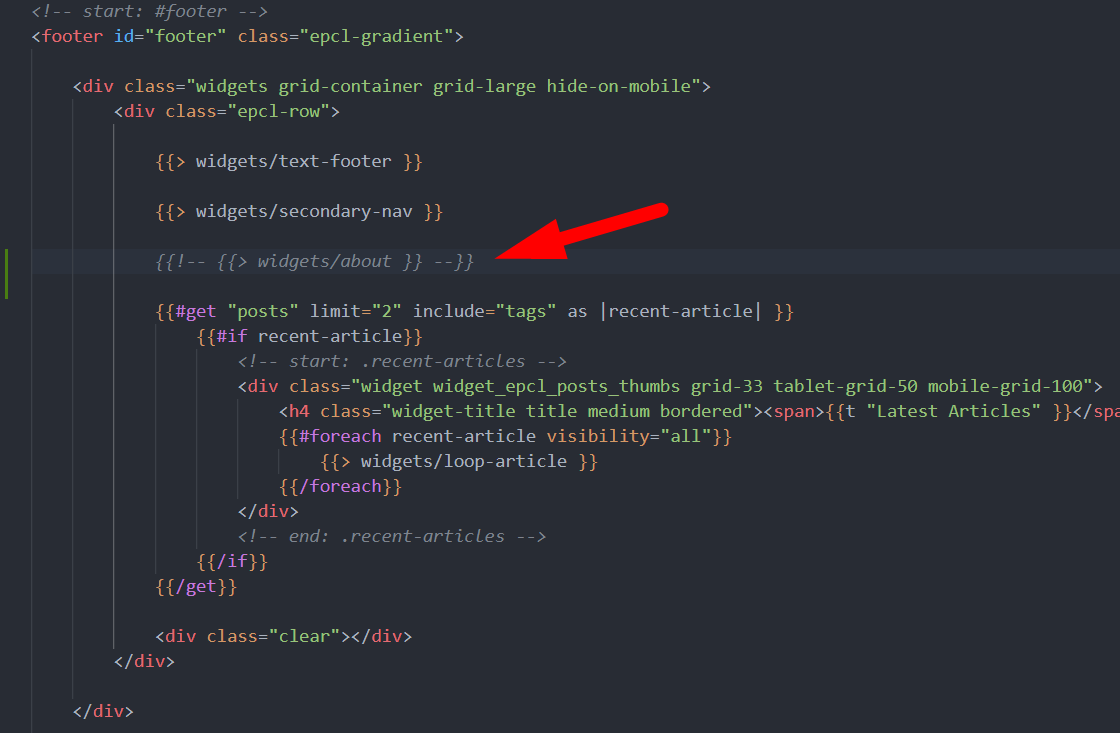
How to add widgets to the Footer Area
- Go to
zento/partials/footer.hbs - All widgets are inside the folder
zento/partials/widgets - Add the desired widget following the next format
{{> widgets/about }}
The widget must be added between “epcl-row” container:
💡
In case you want to edit the “About Website” widget (located on Footer), go to zento/partials/text-footer.hbs and edit the content there.